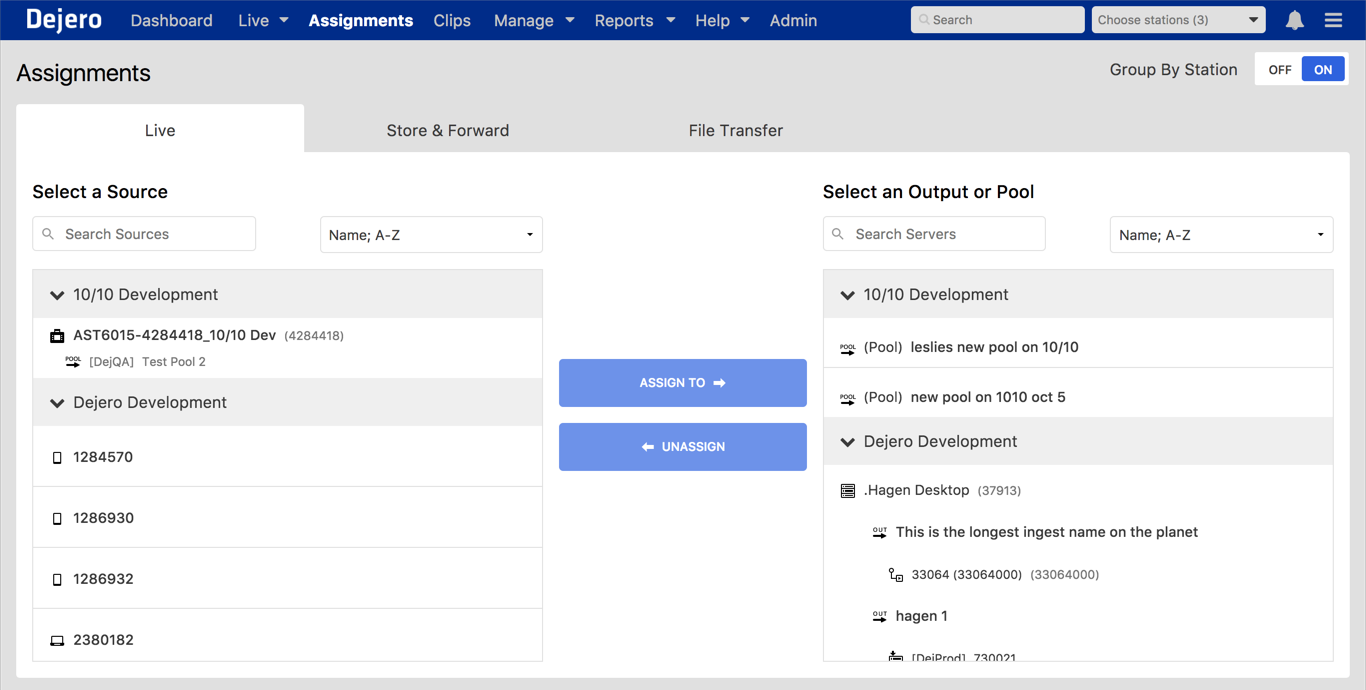
Last week, we shared with you how the ExpertFile integration works in the latest release of Dejero Control. Now that all customers have received the new version, let's go over another great feature in this release: the Assignments page.
Based on customer feedback, the new Assignments page provides users with a straight forward way of streamlining and viewing assignments. Before adding the new Assignments page to Control, users could go to Live Grid or Manage>Sources to make their assignments. While assigning sources in this way was simple, users monitoring many sources across multiple stations may have experienced slower performance based on the number of sources and outputs they have access to.
With the Assignments page, you’ll see faster page load with several hundred sources and outputs. You’ll also be able to “assign all”, meaning you can make an assignment in Store & Forward and File Transfer in addition to the Live assignment – all with only one additional click!
Now, let’s walk you through the highlights of the Assignments page.
From the Dashboard, select the Assignments tab. On the page, you’ll see separate tabs for Live, Store & Forward, and File Transfer.
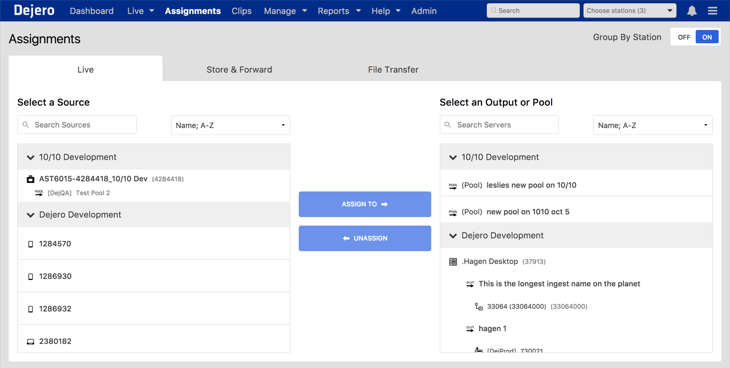
If you have access to multiple stations, you'll notice the Group by Station toggle, located in the top right corner of the page. If you only have access to one station, this option will not appear in Control.
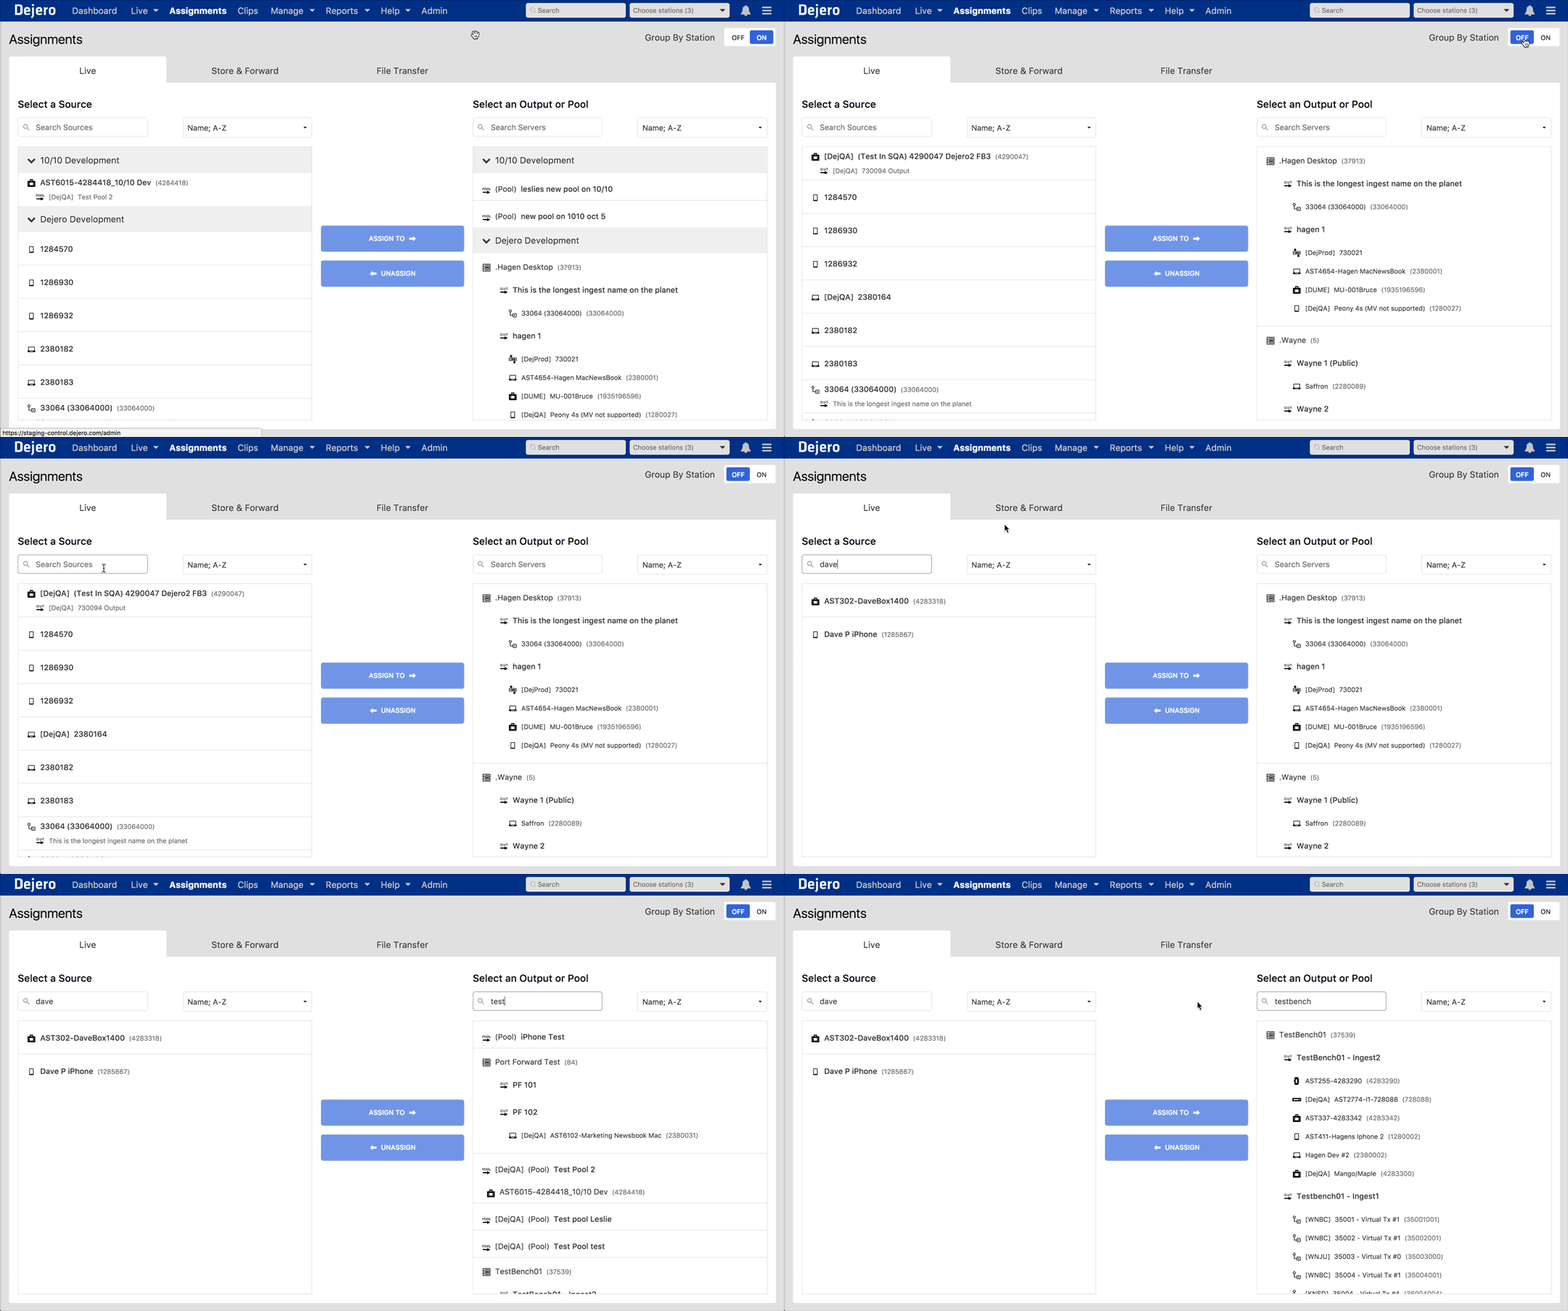
With the option to Group by Station OFF, all station sources that you have access to are in a single list. You can use the search and sort to narrow your search on sources and servers.
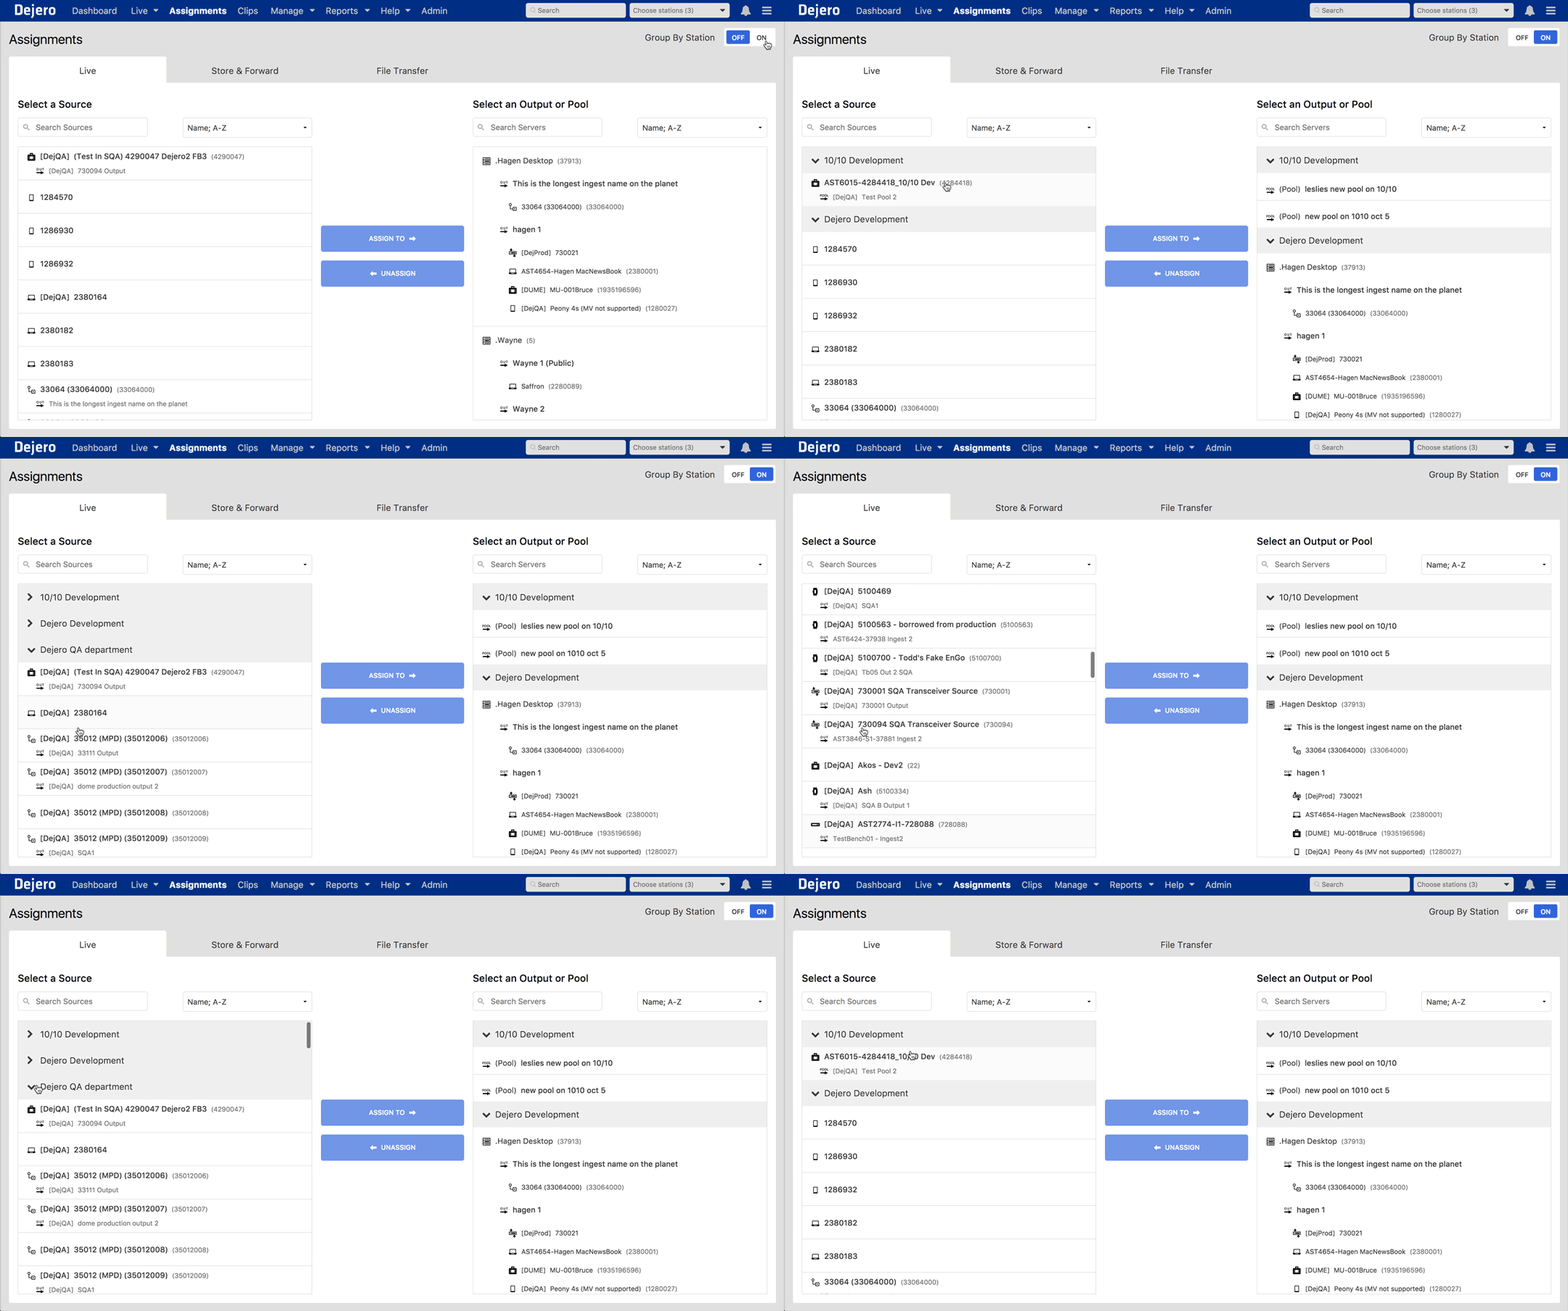
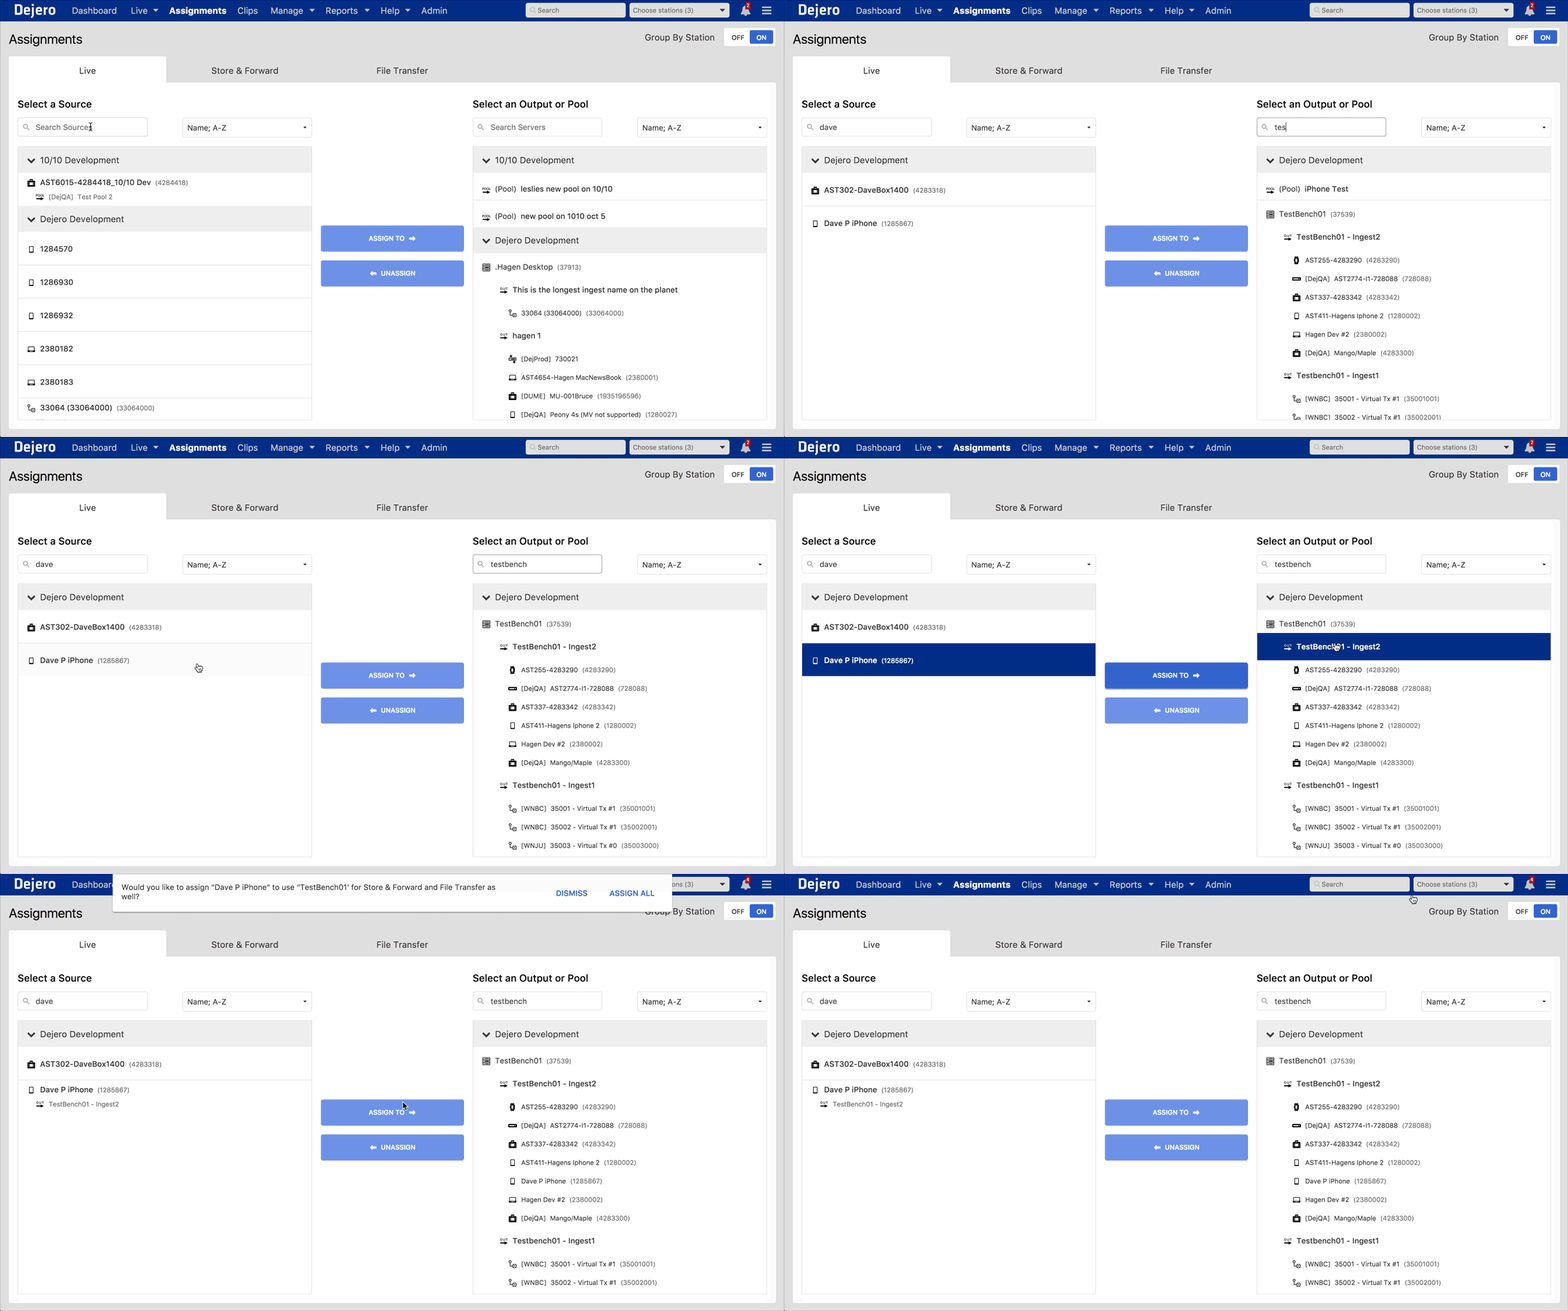
With the option to Group by Station ON, you can see the assets within their owner’s station. The expandable and collapsible sections help organize sources, outputs, and servers.
To assign a source, select the source and the output you want to assign it to. Now click the assign to button or drag and drop the source to the desired output to complete the assignment.
You’ll notice a modal appears at the top of the page to assign all. By clicking this, you can assign the Store & Forward and File Transfer to the same server as the output. If you ignore the modal, it will disappear.
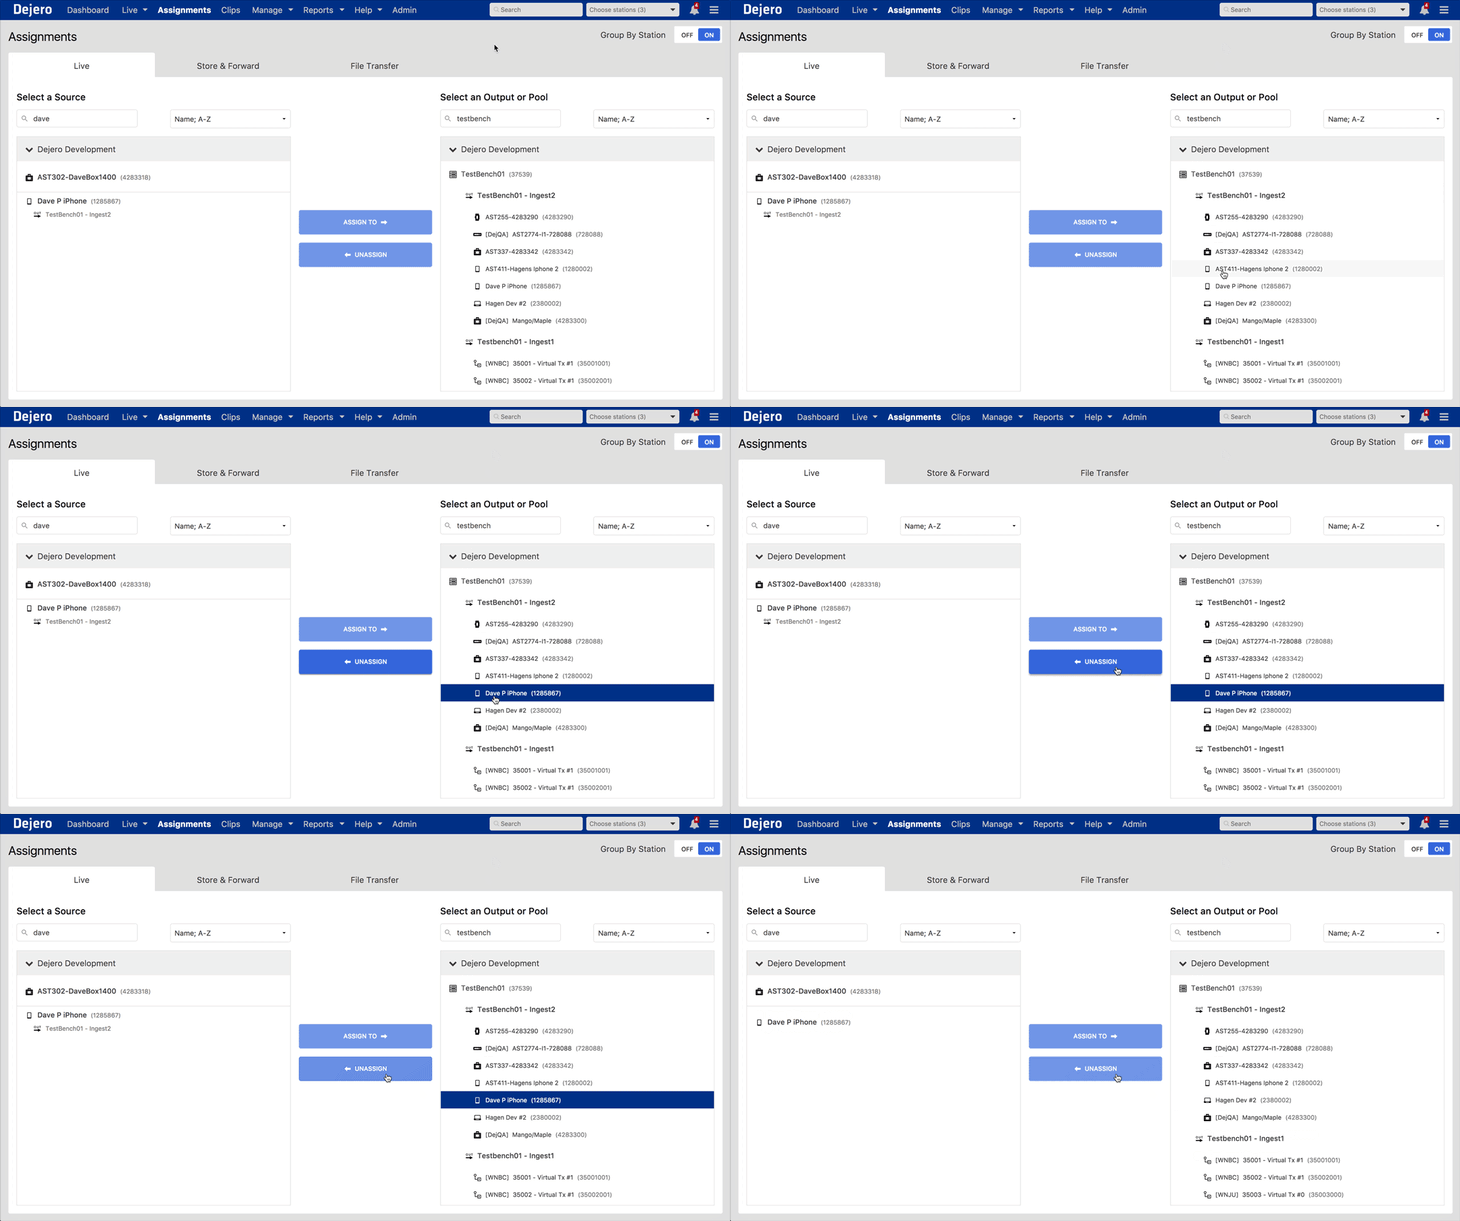
To unassign a source, select the source in the outputs list and click unassign or drag and drop the source from the output list back to the sources list.
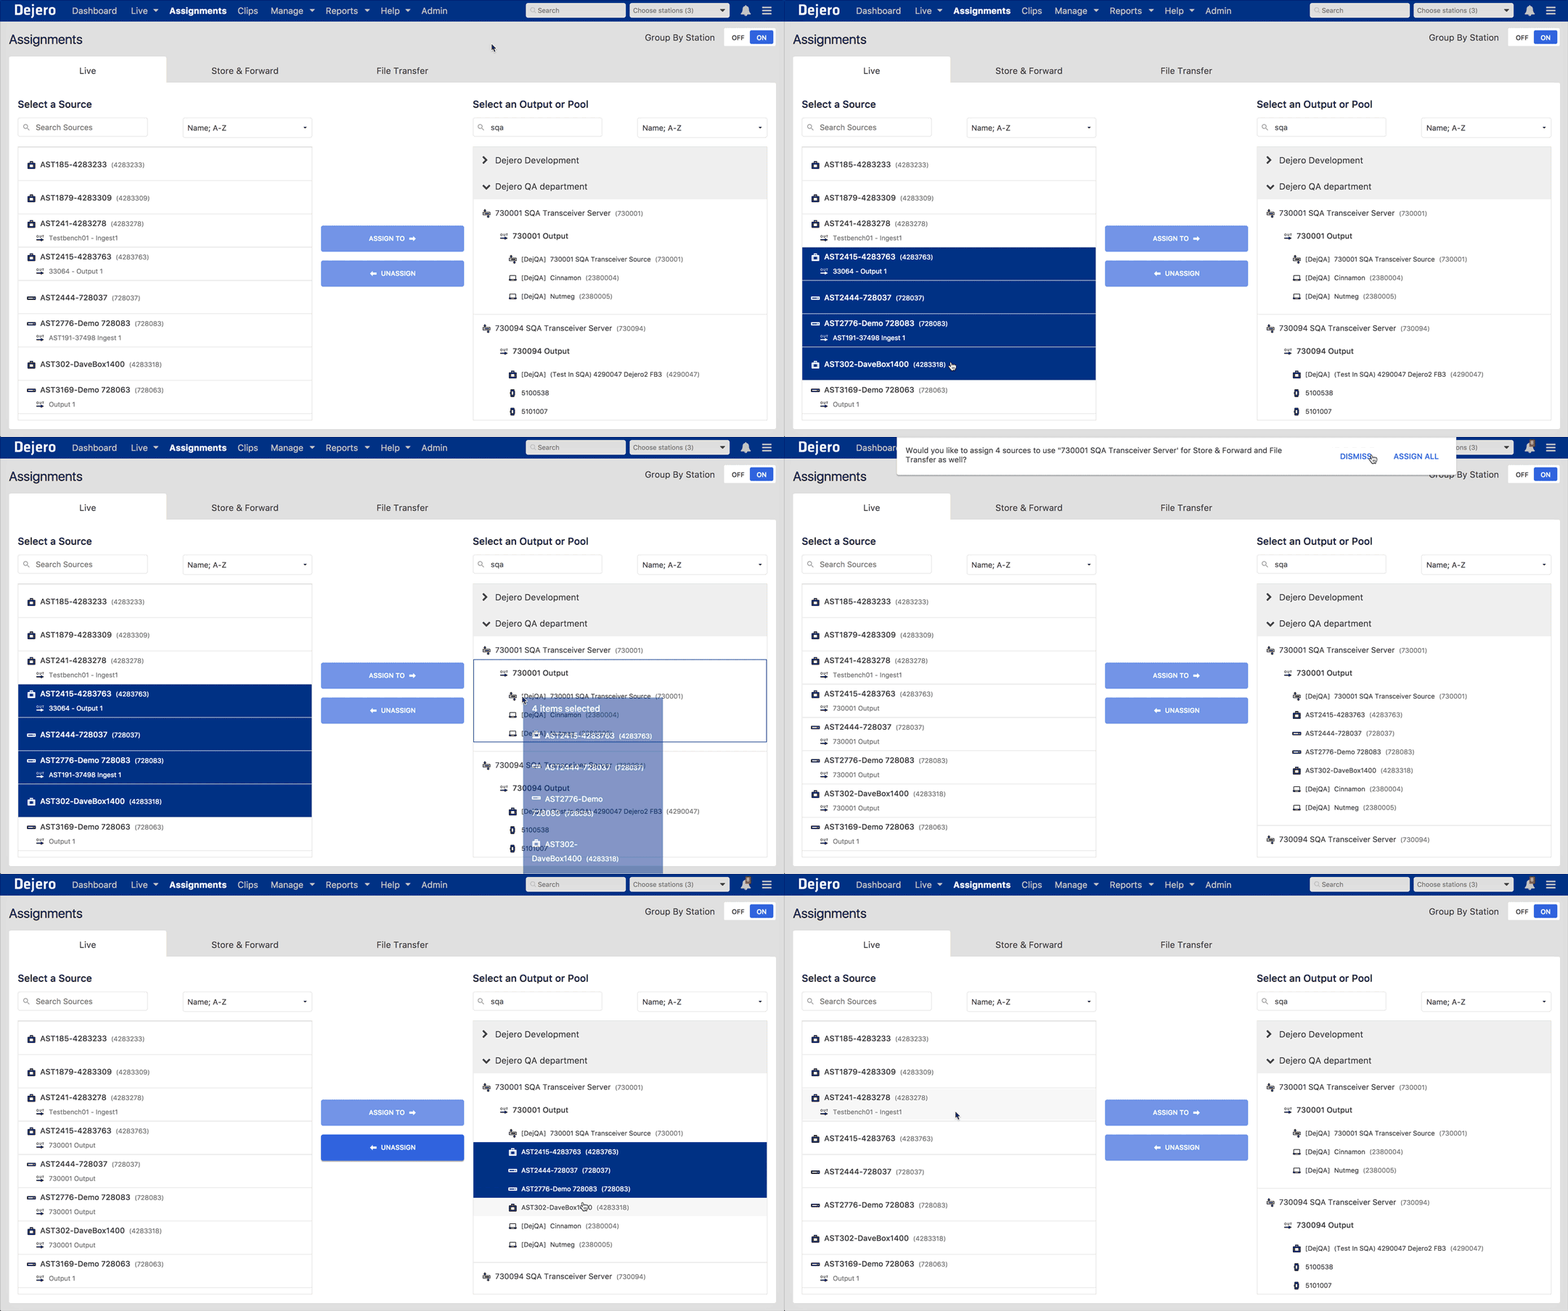
You can also select multiple sources from the list to assign to a single output. Similarly, you can select multiple sources on the output list to unassign those sources from that output. Either use the unassign button or drag and drop to unassign as shown below.
If you’re curious about the Store & Forward and File Transfer tabs, they offer the same functionality for making assignments to the servers.
Well, that’s the new Assignments page in a nutshell. Loving this feature? Let us know by submitting your feedback directly in Control under Help > Give Feedback.
We also encourage customers to check out the release notes, available in the Support Hub, for more features and enhancements – like the improvements to saved filters on the Live Grid page. You can access the Support Hub directly from the Help menu in Control.

